在《研发工程师玩转Kubernetes——部署应用》一文中,我们使用kubectl expose创建了一个Service,暴露了一个Pod上的nginx服务。这篇文章我们将使用文件的形式创建Service。
为了增加有趣性,我们采用《研发工程师玩转Kubernetes——构建、推送自定义镜像》中的镜像部署两个Pod。这两个Pod有不同的Cluster IP(kubernetes内部IP),而Service将同时暴露这两个Pod上的服务。这样我们访问Service时,将通过打印出来的IP得知本次请求被分配到哪个Pod上。
创建Pod
编写Pod资源文件
我们创建两个yaml文件:simple_http_a.yaml和simple_http_b.yaml。
apiVersion: v1
kind: Pod
metadata:
  name: simple-http-a
  labels:
    name: simple-http-a
    image: simple_http
    version: v1
spec:
  containers:
  - name: simple-http-container
    image: localhost:32000/simple_http:v1
    ports:
      - containerPort: 8888
apiVersion: v1
kind: Pod
metadata:
  name: simple-http-b
  labels:
    name: simple-http-b
    image: simple_http
    version: v1
spec:
  containers:
  - name: simple-http-container
    image: localhost:32000/simple_http:v1
    ports:
      - containerPort: 8888
和《研发工程师玩转Kubernetes——通过文件创建Pod》不同的是,我们给labels增加了新的标签image:simple_http。后面我们要通过这个标签,筛选出供Service使用的Pod。
创建
在上述文件的目录执行下面的指令
kubectl create -f simple_http_a.yaml -f simple_http_b.yaml
查看
kubectl describe pod simple-http-a simple-http-b
Name:             simple-http-a
Namespace:        default
Priority:         0
Service Account:  default
Node:             fangliang-virtual-machine/172.30.45.36
Start Time:       Fri, 19 May 2023 20:32:50 +0800
Labels:           image=simple_http
                  name=simple-http-a
                  version=v1
Annotations:      cni.projectcalico.org/containerID: 10384e0dd24726b0e5265bcc12252bb8a9ecf917d9603f8ce62135ca93fa0573
                  cni.projectcalico.org/podIP: 10.1.62.160/32
                  cni.projectcalico.org/podIPs: 10.1.62.160/32
Status:           Running
IP:               10.1.62.160
IPs:
  IP:  10.1.62.160
Containers:
  simple-http-container:
    Container ID:   containerd://deaf2b805292288ca609095993699911c9be1cda96439a77946df20959b01bea
    Image:          localhost:32000/simple_http:v1
    Image ID:       localhost:32000/simple_http@sha256:cbee584f83426593efb95a9e2213bb40143a1c86c3d217e65d30430033f846d4
    Port:           8888/TCP
    Host Port:      0/TCP
    State:          Running
      Started:      Fri, 19 May 2023 20:32:52 +0800
    Ready:          True
    Restart Count:  0
    Environment:    <none>
    Mounts:
      /var/run/secrets/kubernetes.io/serviceaccount from kube-api-access-kzscm (ro)
Conditions:
  Type              Status
  Initialized       True
  Ready             True
  ContainersReady   True
  PodScheduled      True
Volumes:
  kube-api-access-kzscm:
    Type:                    Projected (a volume that contains injected data from multiple sources)
    TokenExpirationSeconds:  3607
    ConfigMapName:           kube-root-ca.crt
    ConfigMapOptional:       <nil>
    DownwardAPI:             true
QoS Class:                   BestEffort
Node-Selectors:              <none>
Tolerations:                 node.kubernetes.io/not-ready:NoExecute op=Exists for 300s
                             node.kubernetes.io/unreachable:NoExecute op=Exists for 300s
Events:                      <none>


Name:             simple-http-b
Namespace:        default
Priority:         0
Service Account:  default
Node:             fangliang-virtual-machine/172.30.45.36
Start Time:       Fri, 19 May 2023 20:32:50 +0800
Labels:           image=simple_http
                  name=simple-http-b
                  version=v1
Annotations:      cni.projectcalico.org/containerID: b34e51ad923f778cdba027b7bf361c534c7f4f4e40da1d5bd7c0466bbfaf9fa1
                  cni.projectcalico.org/podIP: 10.1.62.159/32
                  cni.projectcalico.org/podIPs: 10.1.62.159/32
Status:           Running
IP:               10.1.62.159
IPs:
  IP:  10.1.62.159
Containers:
  simple-http-container:
    Container ID:   containerd://0b982826db40467ff7698629782e8d16d9560237027d18b3bc2305e894331c34
    Image:          localhost:32000/simple_http:v1
    Image ID:       localhost:32000/simple_http@sha256:cbee584f83426593efb95a9e2213bb40143a1c86c3d217e65d30430033f846d4
    Port:           8888/TCP
    Host Port:      0/TCP
    State:          Running
      Started:      Fri, 19 May 2023 20:32:52 +0800
    Ready:          True
    Restart Count:  0
    Environment:    <none>
    Mounts:
      /var/run/secrets/kubernetes.io/serviceaccount from kube-api-access-2vdsc (ro)
Conditions:
  Type              Status
  Initialized       True
  Ready             True
  ContainersReady   True
  PodScheduled      True
Volumes:
  kube-api-access-2vdsc:
    Type:                    Projected (a volume that contains injected data from multiple sources)
    TokenExpirationSeconds:  3607
    ConfigMapName:           kube-root-ca.crt
    ConfigMapOptional:       <nil>
    DownwardAPI:             true
QoS Class:                   BestEffort
Node-Selectors:              <none>
Tolerations:                 node.kubernetes.io/not-ready:NoExecute op=Exists for 300s
                             node.kubernetes.io/unreachable:NoExecute op=Exists for 300s
Events:                      <none>
可以看到Pod simple-http-a的内部IP是10.1.62.160,simple-http-b是10.1.62.159。
创建Service
编写Service资源文件
apiVersion: v1
kind: Service
metadata:
  name: simple-http-service
spec:
  type: NodePort
  selector:
    image: simple_http
  ports:
  - port: 80
    targetPort: 8888
    nodePort: 30000
因为我们的Service需要对外提供服务,即通过物理机器IP访问,于是要把type设置为NodePort。
selector表示该Service将包装什么样的Pod,它是通过资源的Labels检索的。image:simple_http和Pod资源文件中的Labels强匹配了。
targetPort: 8888,表示容器开放的端口是8888。
port: 80,表示这个服务在内部使用80端口提供服务。
nodePort: 30000表示我们将物理机的30000端口映射到这个服务上。
创建
在上述文件所在目录执行下面的指令
kubectl create -f simple_http_service.yaml
查看
kubectl describe service simple-http-service
Name:                     simple-http-service
Namespace:                default
Labels:                   <none>
Annotations:              <none>
Selector:                 image=simple_http
Type:                     NodePort
IP Family Policy:         SingleStack
IP Families:              IPv4
IP:                       10.152.183.88
IPs:                      10.152.183.88
Port:                     <unset>  80/TCP
TargetPort:               8888/TCP
NodePort:                 <unset>  30000/TCP
Endpoints:                10.1.62.159:8888,10.1.62.160:8888
Session Affinity:         None
External Traffic Policy:  Cluster
Events:                   <none>
该Service在kubernetes内部的IP是10.152.183.88,port是80。
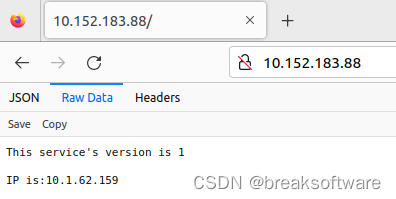
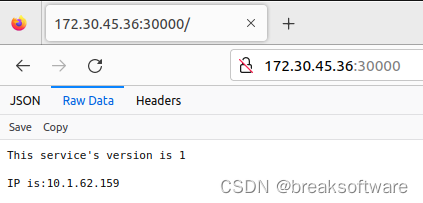
通过物理机IP 172.30.45.36访问的port是30000。
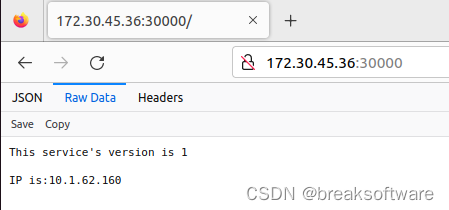
负载均衡
我们多访问几次该Service,可以看到10.1.62.160和10.1.62.159两个Pod都会响应请求。
它有两个Endpoints,分别是simple-http-a和simple-http-b两个Pod的IP:TargetPort。
参考资料
- https://kubernetes.io/docs/concepts/overview/working-with-objects/labels/