Terraform实践
- 1. Terraform Docker Example
- 1.1 Install Terraform
- 1.2 Verify the installation
- 1.3 Enable tab completion
- 1.4 Quick start tutorial
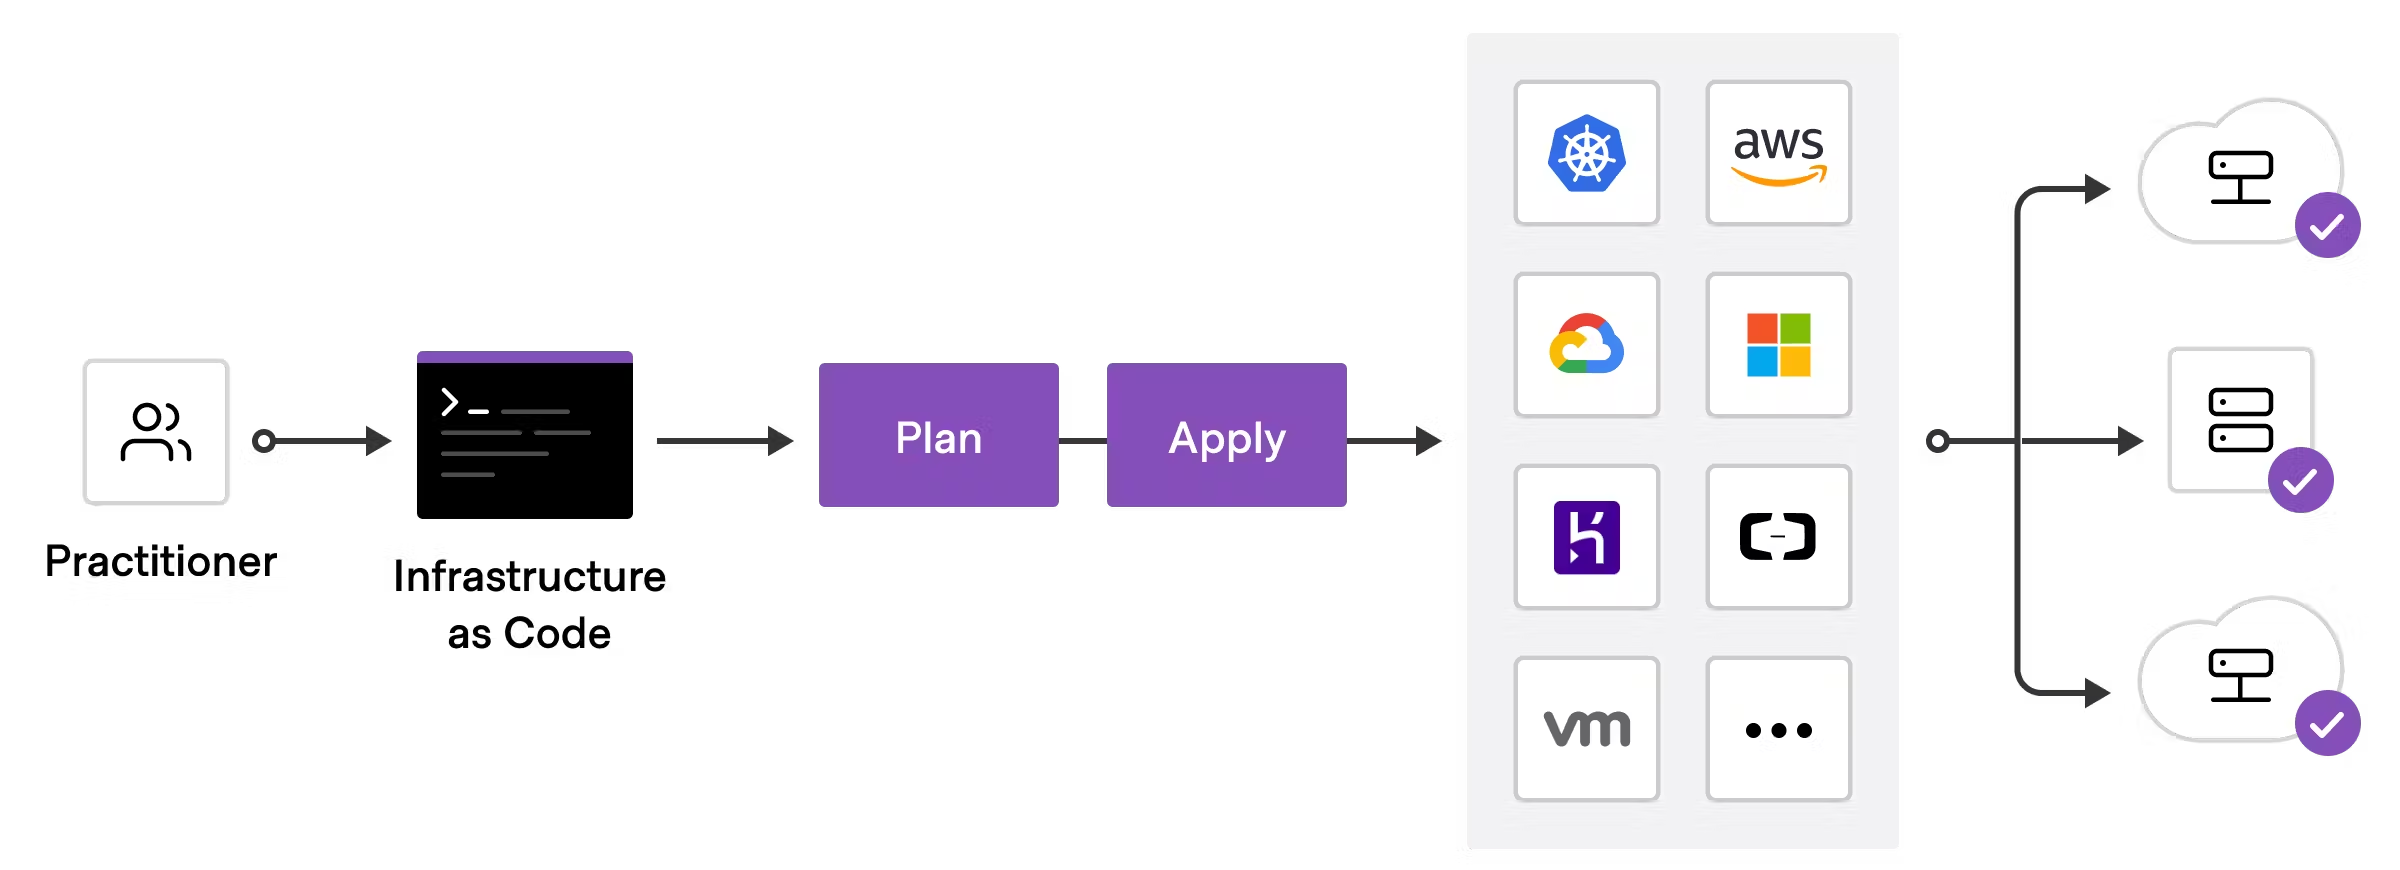
To deploy infrastructure with Terraform:
- Scope - Identify the infrastructure for your project.
- Author - Write the configuration for your infrastructure.
- Initialize - Install the plugins Terraform needs to manage the infrastructure.
- Plan - Preview the changes Terraform will make to match your configuration.
- Apply - Make the planned changes.
1. Terraform Docker Example
https://developer.hashicorp.com/terraform/tutorials/docker-get-started
1.1 Install Terraform
yum install -y yum-utils
yum-config-manager --add-repo https://rpm.releases.hashicorp.com/RHEL/hashicorp.repo
yum -y install terraform
Tip
Now that you have added the HashiCorp repository, you can install Vault, Consul, Nomad and Packer with the same command.
1.2 Verify the installation
[root@node-252 ~]# terraform -help
Usage: terraform [global options] <subcommand> [args]

The available commands for execution are listed below.
The primary workflow commands are given first, followed by
less common or more advanced commands.

Main commands:
  init          Prepare your working directory for other commands
  validate      Check whether the configuration is valid
  plan          Show changes required by the current configuration
  apply         Create or update infrastructure
  destroy       Destroy previously-created infrastructure
...
[root@node-252 ~]# terraform -help plan
Usage: terraform [global options] plan [options]

  Generates a speculative execution plan, showing what actions Terraform
  would take to apply the current configuration. This command will not
  actually perform the planned actions.

  You can optionally save the plan to a file, which you can then pass to
  the "apply" command to perform exactly the actions described in the plan.
...
Troubleshoot
If you get an error that terraform could not be found, your PATH environment variable was not set up properly. Please go back and ensure that your PATH variable contains the directory where Terraform was installed.
1.3 Enable tab completion
If you use either Bash or Zsh, you can enable tab completion for Terraform commands. To enable autocomplete, first ensure that a config file exists for your chosen shell.
touch ~/.bashrc
Then install the autocomplete package.
[root@node-252 ~]# terraform -install-autocomplete
1.4 Quick start tutorial
Now that you’ve installed Terraform, you can provision an NGINX server in less than a minute using Docker on Mac, Windows, or Linux. You can also follow the rest of this tutorial in your web browser.
- Create a directory named learn-terraform-docker-container.
mkdir learn-terraform-docker-container
- Navigate into the working directory.
cd learn-terraform-docker-container
- In the working directory, create a file called
main.tfand paste the following Terraform configuration into it.
terraform {
  required_providers {
    docker = {
      source  = "kreuzwerker/docker"
      version = "~> 3.0.1"
    }
  }
}

provider "docker" {}

resource "docker_image" "nginx" {
  name         = "nginx"
  keep_locally = false
}

resource "docker_container" "nginx" {
  image = docker_image.nginx.image_id
  name  = "tutorial"

  ports {
    internal = 80
    external = 8000
  }
}
- Initialize the project, which downloads a plugin called a provider that lets Terraform interact with Docker.
terraform init
- Provision the NGINX server container with apply. When Terraform asks you to confirm type yes and press ENTER.
terraform apply
[root@node-135 learn-terraform-docker-container]# terraform apply

Terraform used the selected providers to generate the following execution plan. Resource actions are indicated with the following
symbols:
  + create

Terraform will perform the following actions:

  # docker_container.nginx will be created
  + resource "docker_container" "nginx" {
      + attach                                      = false
      + bridge                                      = (known after apply)
      + command                                     = (known after apply)
      + container_logs                              = (known after apply)
      + container_read_refresh_timeout_milliseconds = 15000
      + entrypoint                                  = (known after apply)
      + env                                         = (known after apply)
      + exit_code                                   = (known after apply)
      + hostname                                    = (known after apply)
      + id                                          = (known after apply)
      + image                                       = (known after apply)
      + init                                        = (known after apply)
      + ipc_mode                                    = (known after apply)
      + log_driver                                  = (known after apply)
      + logs                                        = false
      + must_run                                    = true
      + name                                        = "tutorial"
      + network_data                                = (known after apply)
      + read_only                                   = false
      + remove_volumes                              = true
      + restart                                     = "no"
      + rm                                          = false
      + runtime                                     = (known after apply)
      + security_opts                               = (known after apply)
      + shm_size                                    = (known after apply)
      + start                                       = true
      + stdin_open                                  = false
      + stop_signal                                 = (known after apply)
      + stop_timeout                                = (known after apply)
      + tty                                         = false
      + wait                                        = false
      + wait_timeout                                = 60

      + ports {
          + external = 8000
          + internal = 80
          + ip       = "0.0.0.0"
          + protocol = "tcp"
        }
    }

  # docker_image.nginx will be created
  + resource "docker_image" "nginx" {
      + id           = (known after apply)
      + image_id     = (known after apply)
      + keep_locally = false
      + name         = "nginx"
      + repo_digest  = (known after apply)
    }

Plan: 2 to add, 0 to change, 0 to destroy.

Do you want to perform these actions?
  Terraform will perform the actions described above.
  Only 'yes' will be accepted to approve.

  Enter a value: yes

docker_image.nginx: Creating...
docker_image.nginx: Still creating... [10s elapsed]
docker_image.nginx: Still creating... [20s elapsed]
docker_image.nginx: Still creating... [30s elapsed]
docker_image.nginx: Still creating... [42s elapsed]
docker_image.nginx: Still creating... [52s elapsed]
docker_image.nginx: Creation complete after 54s [id=sha256:eea7b3dcba7ee47c0d16a60cc85d2b977d166be3960541991f3e6294d795ed24nginx]
docker_container.nginx: Creating...
docker_container.nginx: Still creating... [10s elapsed]
docker_container.nginx: Still creating... [21s elapsed]
docker_container.nginx: Creation complete after 22s [id=109baf53333c9a9b71695a1d639eedd29e6cb8afd0ef259b88cd5c998efe6983]

Apply complete! Resources: 2 added, 0 changed, 0 destroyed.
- Verify the existence of the NGINX container by visiting localhost:8000 in your web browser or running docker ps to see the container.
docker ps
[root@node-135 learn-terraform-docker-container]# docker ps
CONTAINER ID   IMAGE              COMMAND                  CREATED          STATUS          PORTS                    NAMES
109baf53333c   eea7b3dcba7e       "/docker-entrypoint.…"   59 seconds ago   Up 39 seconds   0.0.0.0:8000->80/tcp     tutorial
- To stop the container, run terraform destroy.
terraform destroy